In our previous posts, we’ve relied on Stata’s pre-loaded datasets to perform analyses. But when you’re working with your own data, you’ll need to know how to import it into Stata.
To demonstrate how this process works, we will use the Iris dataset from UCI.
Download the dataset, then move it to whichever directory you intend to use for Stata files.
There are three main ways of importing data in Stata: either use the menus to import the data, call the dataset by its full file extension, or change your directory to the one with your data and then refer to the dataset by name.
Importing data with Stata’s menus
Click File -> Import -> Text data
You may be tempted to try to import this dataset as an Excel file (because it looks like one and opens in Excel if you click on it), but pay attention to the “.csv” file extension. Stata won’t let us import this as an Excel file.
Click on the folder icon in the top right, then look through your directory to find the Iris data and click on it.
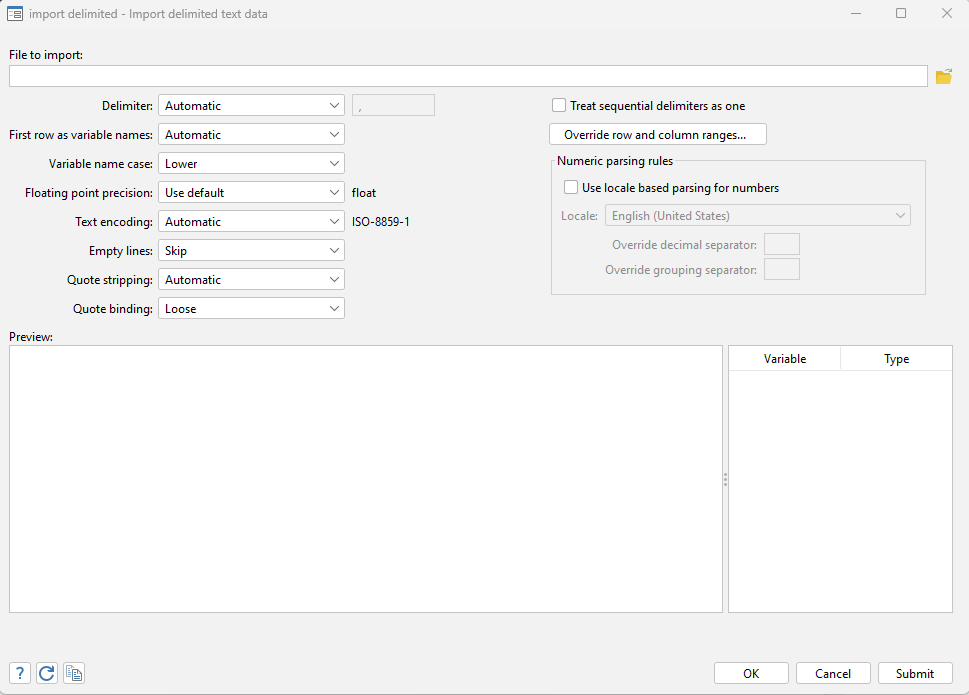
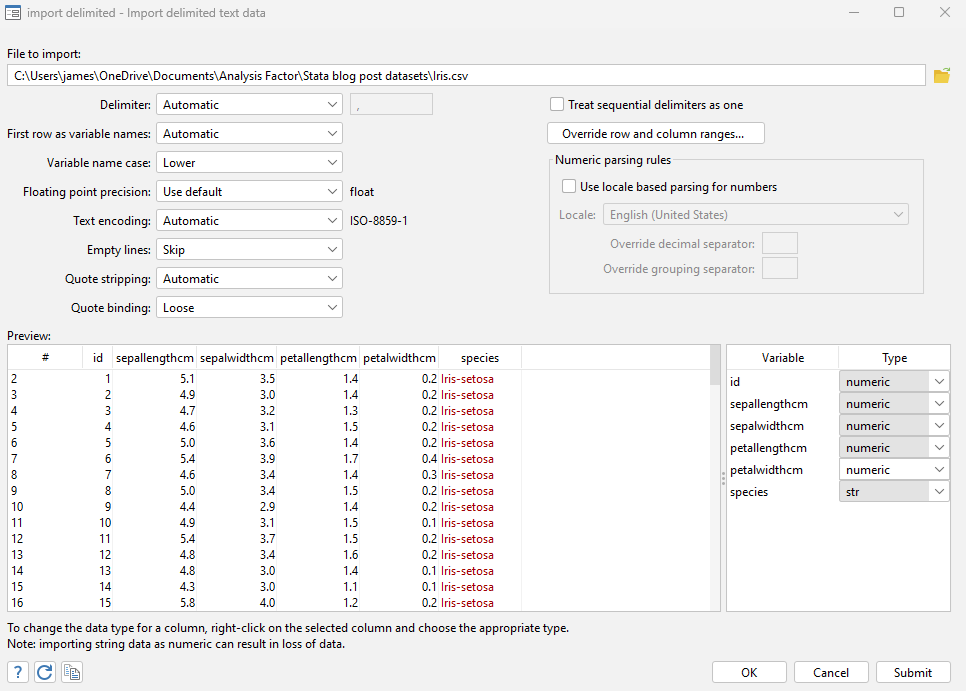
You should now see a window that looks like this. Let’s go over some of the options here that are most commonly used.
Our dataset is displayed in the Preview window, so we can see how it will look if we import it.
To the right of the preview window, we can change the type of each of our variables. Imagine we decide our ID variable makes more sense as a string. Let’s select the type for id and change it to say “str”.
Delimiter
Delimiter tells Stata what to use to differentiate between data points. We can leave this on automatic because we need to separate by commas.
First row as variable names
Stata sets First row as variable names to “Automatic” by default. Look what happens if you were to switch it to “never”. It now thinks the titles for the columns are part of the data, and therefore that these must all be string variables. Switch it back to automatic.
Variable name case
The default is “Lower”. This switches all the column names to be all lower case, regardless of what they were on import. This is fine to leave as it is.
Empty lines
Stata defaults empty lines to “skip”. This means that if we were to import an excel file/csv with several lines of blank space at the top, Stata wouldn’t try to read these rows as data. This should usually be kept at “skip”.
You can ignore the rest of the options for now, as you won’t need to change them for most datasets you encounter. Click “OK” to import the data.
If you get asked about clearing other data in memory, click yes.
The data set should now be imported and you should see code in the results window that looks something like
import delimited "C:\Users\james\OneDrive\Documents\Analysis Factor\Stata blog post datasets\Iris.csv", stringcols(1) clear
When you use the menus to import a non-csv file, the options available to you will look different.
CSV has the most options so typically the options available for other data format imports are some subset of the ones discussed here.
Importing data using the full file extension
If you finished importing with the menus, you probably have a pretty good idea of how this works.
To import CSV data, you type the following (either into the command window or a Do-file)
import delimited “full file location\filename.csv”, clear
For me this looks like
import delimited "C:\Users\james\OneDrive\Documents\Analysis Factor\Stata blog post datasets\Iris.csv", clear
If we wanted to change the type of the first column to be a string, we can add that option after the comma
import delimited "C:\Users\james\OneDrive\Documents\Analysis Factor\Stata blog post datasets\Iris.csv", stringcols(1) clear
If we imported a different data format like excel, the process would be mostly the same, except it would say “import excel” and use the .xlsx extension.
After you’ve run the import command, try removing “clear” and run it again. Notice how you get an error?
Stata only ever has one data set loaded in at a time, so when you tell it to import a new dataset, you are telling it to clear out the old one. If you’ve made any changes to the dataset, it assumes that you want to save those changes and won’t load up the new dataset for fear of ruining the old one.
The “clear” option tells Stata you know you will be clearing out the old dataset, and you aren’t worried about saving it.
Importing data by changing directory and referring to the variable by name
When I use Stata to import data, this is most often how I do it.
Begin by changing your directory to the one containing your data. If you don’t know the right extension for this directory, the menus can help.
Click File -> Change working directory, then select the one you want. When I do this, I get the output
cd "C:\Users\james\OneDrive\Documents\Analysis Factor\Stata blog post datasets"
So if you want to change the directory with syntax, type “cd” followed by the directory in quotes.
After switching the directory I can type
import delimited Iris, clear
Since Stata already knows the directory you’re in, you can refer to Iris without mentioning its directory or even using quotes around the name.
If the name of the file has any spaces in it, you will still need to surround the name in quotes.
This is typically the method I use in do-files, because with those we should be changing our directory anyway.
If you need more help with some detail of importing, remember you can type
h import
into the command line and get a list of resources explaining the options available to you.
With that in mind, you should be ready to go out there and start working on your own datasets. In the next post, we’ll look at examining and altering our datasets in Stata.
By James Harrod
About the Author: James Harrod interned at The Analysis Factor in the summer of 2023. He plans to continue into a career as an actuary, and hopes to continue finding interesting ways of educating people about statistics. James is well-versed in R and Stata programming and enjoys teaching the intuition behind common statistical methods. James is a 2023 graduate of the University of Rochester with bachelor’s degrees in Statistics and Economics.


Leave a Reply